 Wingspan Tech



Removing Paint With a Pressure Washer: 5 Easy Steps
Do you want to use a high-pressure washer to knock out the old paint, but don’t want to destroy the surface underneath? Listen to me, follow this process: first apply a layer of environmentally friendly paint stripper, wait patiently for 30 minutes, then install a 15-degree nozzle on your high-pressure washer, adjust the pressure to 2500 PSI, and finally maintain a distance of 12 inches (about 30cm), with a 45-degree angle to rinse the peeling paint.
Many friends who do it themselves (DIY) on weekends often try to save trouble, skip the step of chemical paint removal and rely on water pressure to fight with old paint. The result? The wooden deck was washed into potholes, the mortar in the cracks in the brick walls was blown up, and ugly scratches were left on the concrete floor.
I ‘ve been crawling around in the facade renovation business for years. Take my 1 advice and stop thinking of your pressure washer as a “magic eraser. You have to have a systematic way of getting rid of old acrylic or oil paint safely. Today, I will give you the exclusive secret of professional master’s efficient paint removal.
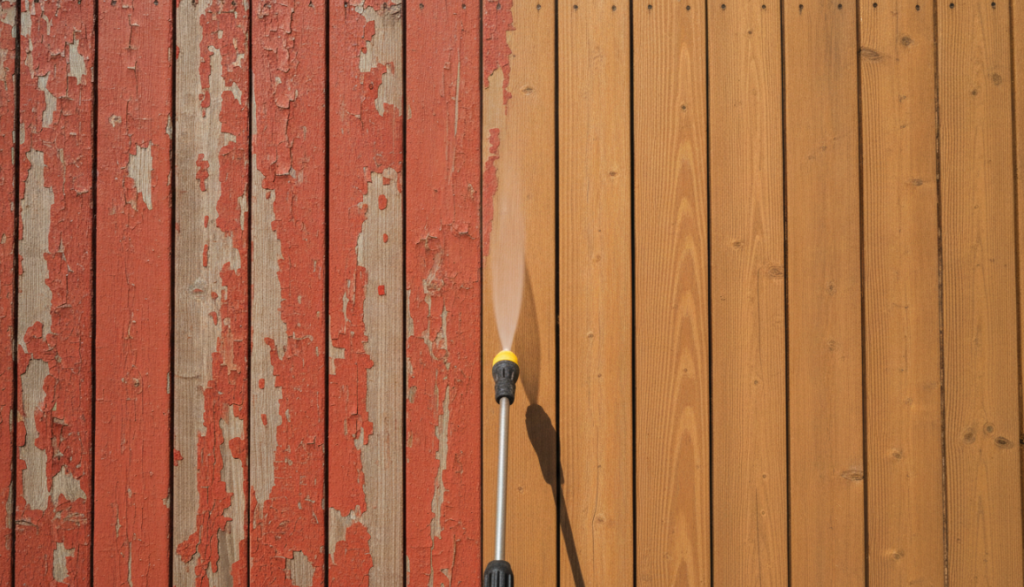
Why “Miracles” Alone Will Never Work.
Pure high-pressure water can’t dissolve the paint at all, it can only wash away the paint that is already sticky. If you expect to use the ultra-high pressure of 4000 PSI to hard-pick those stubborn coatings, I can guarantee that the exterior of your house will be destroyed beyond recognition.
Before pulling the trigger, it is better to learn the “P.R.E.P.” rule I summarized to control all kinds of variables well:
P-pressure (Pressure): High PSI (pressure) is used for cutting, high GPM (water flow) is used for cleaning. Paint removal requires moderate pressure (2000 to 3000 PSI) and high water flow (above 2.5 GPM) to wash off the heavy paint residue.
R-Angle (Radius): If the water is directly flushed 90 degrees vertically with the wall surface, the water flow will be forced under the unpeeled paint surface, causing the wood to expand and damage. Remember, the gun must always maintain a 15 to 45 degree tilt angle.
E-Move (Elevation): If the spray gun moves too slowly, it will definitely leave a “burn” mark on the wood. The hand must be steady and keep a uniform shooting movement, just like you are painting with a spray gun.
P-product (Product): Water alone is not enough. First apply a thick layer of gel-like paint remover, which can effectively destroy the chemical bonds of the paint, so you can save at least 1500 PSI pressure and clean the surface easily.
How To Correctly Remove Paint With A High-Pressure Cleaner
Be sure to work strictly in the following order. Just skip any step, and the amount of work to clean up the mess will definitely double in the end.
Step 1: Substrate Test and Lead Paint Investigation
Before the water gets on the wall, test your old paint for lead. Nine out of ten houses built before 1978 used lead paint. If you directly use a high-pressure water gun to flush lead paint, your entire yard will be contaminated with heavy metals and will violate the regulations of the United States Environmental Protection Agency (EPA). Go buy a 3M LeadCheck test stick for more than ten dollars. If the test paper turns red, honestly spend money to ask a qualified professional lead removal team to deal with it.
If the test is OK, then find some thick canvas dust cloth and cover the flowers and shrubs around you. Canvas can catch paint residue and at the same time can penetrate water. Never use plastic tarps, which will not only cover your lawn to death, but also make the ground slippery and extremely dangerous.
Step 2: Apply gel stripper
Pretreatment with or without chemicals is a watershed for amateurs and professional veterans. Find a watering can or a cheap synthetic brush and apply a thick coat of environmentally friendly paint remover.
The advantage of the gel is that it can be hung firmly on a vertical wall and will not drip everywhere. The next step is to wait patiently for 30 to 60 minutes. You’ll see the old paint start to blister and wrinkle. This is actually a chemical reaction to disintegrate the structure of acrylic latex or oil paint-equivalent to carrying 80% of the coolie work for your machine in advance.
Step 3: Adjust the equipment to the best condition
Change your spray gun to a 15-degree or 25-degree nozzle. Never use a 0 degree red nozzle. The water flowing out of that thing is like a scalpel made of water, which can directly cut through the surface of pine board or concrete.
When washing wood, set the machine pressure between 2000 and 2500 PSI. If it is concrete, it can be adjusted to 3000 PSI. After starting the machine, first find a small corner to try spraying to ensure that the water pressure will not damage the material itself.
Step 4: 45-degree angle of “strafing” trick
Keep the spray gun at a 45-degree angle to the wall, and the nozzle is about 12 to 18 inches (30 to 45cm) away from the paint surface.
Before the water hits the work area, pull the trigger in advance, and then smoothly sweep back and forth on the peeling paint, with a certain overlap in the trajectory of each flush. If you are washing the wall, remember to push from top to bottom. This oblique angle is like a liquid scraper, which can directly drill under the blistering paint surface and lift the paint 1 off the whole 1 instead of breaking them into flying powder.
Step 5: cleaning and drying
When the old paint is clean, replace it with a low-pressure soap nozzle and rinse the whole area 1 times with neutralizing cleaning fluid to remove the residual chemicals.
You can stop here, and then you must let the surface dry thoroughly. If you are cleaning wooden side panels or decks, you have to wait at least 48 to 72 hours for sunny and dry weather, and when the wood is completely dry, you can polish the upturned wood spines on the surface and apply a new primer.
Precautions For Substructure
Remember, if you use the water pressure from the concrete floor to flush the cedar plank, the wood will be destroyed in an instant. When dealing with different materials, the above specific data is the bottom line for your safe paint removal.
| Substrate Type | Recommended PSI | Optimal Nozzle | Key Warning |
| Wood (Decking/Siding) | 1,500 – 2,500 max | 25° (Green) | Beware of “Fuzzing”. High pressure tears wood fibers. Keep wand moving constantly. |
| Concrete/Driveways | 3,000 – 3,500 | 15° (Yellow) | Avoid surface pitting. Keep the nozzle at least 12 inches away to protect the top cream layer. |
| Brick & Masonry | 1,500 – 2,000 | 25° (Green) | Do not blast the mortar joints directly. High pressure forces water into the structure, causing mold. |
| Metal Surfaces | 2,000 – 3,000 | 15° (Yellow) | Dry immediately after washing to prevent flash rust. |
The Three Most Expensive Mistakes In Removing Paint With A High-Pressure Cleaner
I ‘ve seen too many DIY novices make weekend leisure projects a disaster because this 3 a common mistake. Avoiding them can save you a lot of money.
Rush the wood “fluffy”
Many novices always like to put the nozzle very close to hard spray when they encounter a few stubborn paint spots that cannot be washed away. This will directly tear the soft cellulose in the wood, making the surface look like a furry carpet. This kind of lint wood can’t be painted at all. You have to spend 3 days pushing a heavy roller sander to “wipe your ass” for your mistakes “.
Put the water in the side plate
If it is the kind of overlapping wall panels that are pressed one by one, don’t flush water from the bottom up, which will hard pour gallons of water into the cavity of the wall. The spray gun has to be tilted down slightly, or completely parallel to the wall panel. Once the water is stuffed behind the board, a terrible black mold will grow in a few weeks.
Ignore the “flash dry” problem of chemical agents
If you apply chemical paint remover against the big sun at noon, this thing will be baked dry in an instant and dry on the old paint. It is best to apply paint remover in the morning or evening. Once the chemical dries up, it will not only be completely ineffective, but will also form a hard shell that you can’t even wash off.
FAQs
Is it okay to use only high-pressure cleaners and no chemical paint remover?
Yes, yes, but only if the paint is rotten and peeling in large areas. If the old paint is still intact and firmly stuck, it must first be coated with a chemical paint remover. If you want to pull off the solid paint by high-pressure water flow, the result is usually that the material underneath is destroyed horribly.
How much PSI pressure does it take to remove the paint?
Probably between 2000 and 3000 PSI will suffice. Wood is delicate and has to be low (2000 PSI or so) to prevent damage. If it is made of cement or metal, it can be driven up to 3000 PSI.
Can my PSI -3200 cleaning machine be used to remove paint?
That’s great, that’s more than enough power. However, because the pressure is relatively high, it is recommended that you change to a 25-degree nozzle (green) with a wider spray angle, or people retreat back and 1, about 18 inches away from the surface, which can reduce the impact of water flow on fragile materials.
How do I collect the paint residue when I wash it?
A thick layer of canvas dust cloth was spread close to the base of the wall. The advantage of canvas is that water can seep into the ground, but fragments of acrylic or oil paint will be perfectly intercepted. Never spread plastic sheeting. It will not only turn water into mud pits, but also wash paint residue and mud into your lawn.
How long does it take to dry the wood after the paint is removed?
Before touching the grinder or repainting, it must be left to dry for at least 48 to 72 hours in warm, dry weather. It is better to get a digital moisture tester to measure it. The moisture content in the wood drops below 15%, so that you can brush the new primer with peace of mind.