
How To Repair A Power Washer Hose
To repair a power washer hose, first relieve the pressure of the pump, and then use a sharp art knife to make a clean “vertical cut” of the damaged part. Remember, be sure to ensure that the incision is smooth and does not damage the internal steel wire braid.
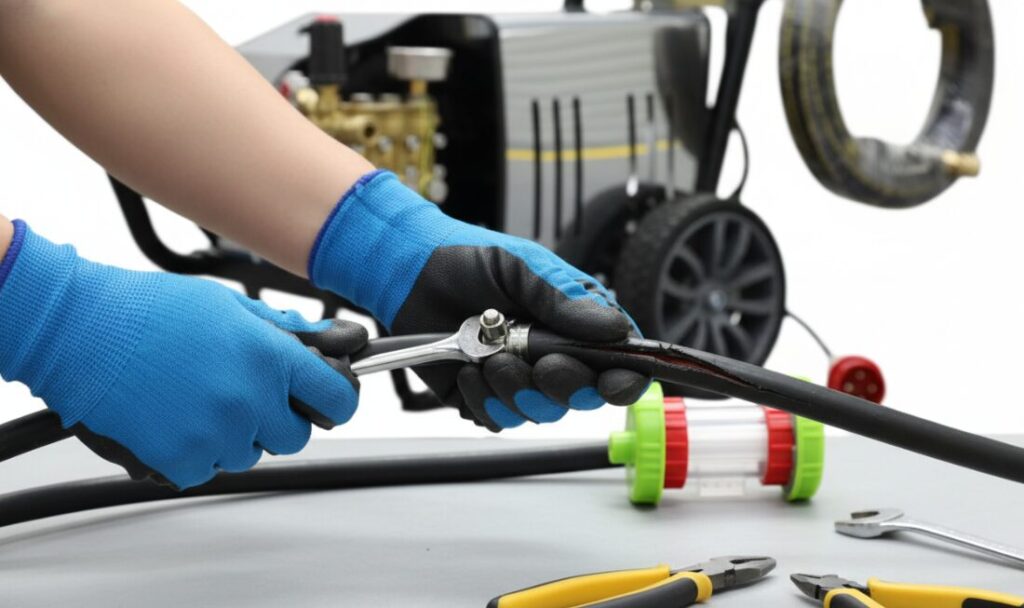
Next, you have to confirm the inner diameter (ID) of the hose—usually 1/4 inch or 5/16 inch—and find a high-pressure connector or coupling that matches the M22 connector or quick-fit specification of your machine. Tighten the hose clamp or compression sleeve with a spanner wrench after the coupling is in place. This step must be tightened hard; otherwise, once the machine is turned on, the huge PSI can instantly flush out the joint.
Repairing high-pressure pipes is a fine job. A tiny leak, if not handled properly, can quickly turn into a safety hazard. By following these professional steps, you can not only restore the performance of the hose but also save a lot of money on new pipes.
Step 1: Preparation And Safety Specifications
Before dismantling, safety is always the first. The operating pressure of a pressure washer usually exceeds 3,000 PSI, which is strong enough to cause serious personal injury.
- System Pressure Relief: Turn off the machine power and water supply. Keep pulling the gun until the remaining water and air pressure in the system are completely exhausted.
- Remove The Hose: Remove the hose from the pump body and spray gun, and find a clean and dry place to operate.
Step 2: Cutting And Checking The Hose
The quality of the repair depends 100% on how well you do across the board.
- Locate The Damage Point: Find the exact location of the leak or burst.
- “Vertical Cut” Technique: Take a very sharp art knife and cut about 1 inch from the damage. The cut must be perpendicular to the hose length. Crooked cuts will cause the joint to fail to fit completely and 100% water will leak in the later period.
- Protect The Steel Wire Braid Layer: Most high-pressure pipes have a steel wire layer inside. The cut should be clean; do not let the wire spread out or excessive flanging, otherwise, the joint is difficult to insert.
O-Series High Pressure Washer 220V
The durable ceramic pump and powerful four-stage motor provide high-performance cleaning power, with adjustable pressure, support for customized voltage and power.
380V 1500Bar Water Blaster
1450 RPM ultra-high pressure water jet pump, high cost performance, suitable for 50Hz voltage. It’s a great tool for removing rust and deburring in factories.
Diesel Power High Pressure Cleaner
The pump unit is the core component of a cleaning machine or water treatment system. Composed of a high-pressure plunger pump and an electric motor
Foam Cannon for car washing
Foam Cannon S V3.0 (Thicker Snow Foam Technology) with 1/4 Inch Quick Connector for Pressure Washer, 34 oz Bottle (V3.0 (1/4″ Quick Connector) + SOAP Sample)
Step 3: Size Measurement And Accessories Selection
The specifications of high-pressure pipes are not uniform. The repair kit you buy must match the hardware in your hand.
- Measure The Inner Diameter (ID): It is best to measure it with a vernier caliper, or directly look at the spray code on the tube. Home machines are mostly 1/4 inch, while commercial ones are usually 5/16 or 3/8 inch.
- Matched Connectors: Verify that your high-voltage connector is compatible with the existing configuration, whether it is a standard M22 threaded connector or a quick-connect specification. A little difference in size will cause the joint to collapse under high pressure.
Step 4: Install Connectors And Fasten Joints
This is the most critical stage in the formation of a physical seal, and it must not be sloppy.
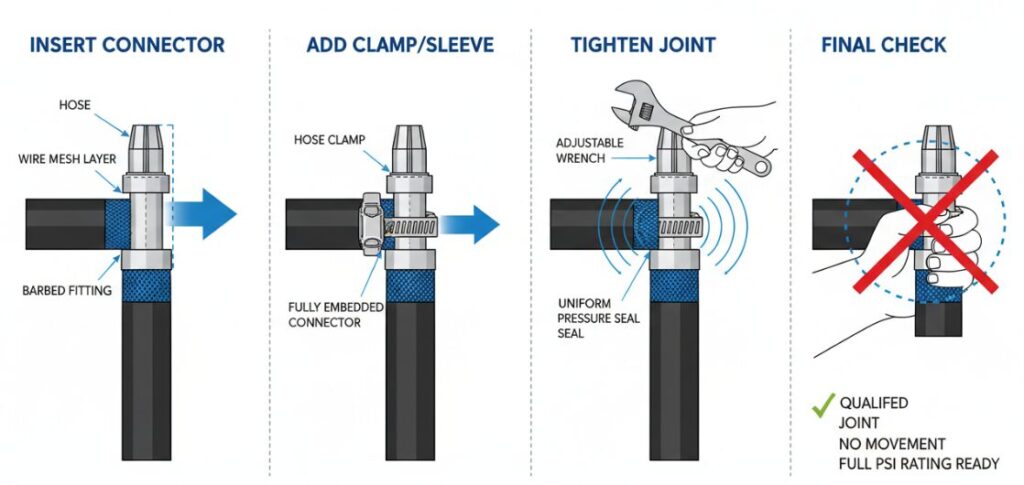
- Insert The Connector: Push the high-pressure connector or barbed fitting into the end of the hose that has just been cut. This should be a very tight, fully embedded state.
- Put On The Clamp Or Sleeve: Slide the hose clamp or compression sleeve over the joint.
- Tightening Procedure: Tighten the compression sleeve or clamp firmly with an adjustable wrench. Our goal is to form a uniform pressure seal around the inner wire layer.
- Check: Make sure that there is no “shaking” at the connection. A qualified joint must be able to withstand the full PSI rating of the machine without the risk of falling out during operation.
Step 5: Testing After Repair
After assembly, the tightness must be tested under load.
Reconnect the hoses to the pump and gun.
Turn on the water source first (do not start the motor) and check whether there is low-pressure leakage.
Start the machine, pull the trigger short, and observe whether the joint is stable under high-pressure impact.
From the vertical cutting of the first knife to the final wrench force, as long as you strictly implement these professional processes, the repaired hose is absolutely durable, safe, and drip-tight.
Author : Robert Harrison
I’m a professional maintenance technician with over 12 years of experience repairing high-pressure cleaning systems. Throughout my career, I’ve handled everything from industrial pump failures to minor hose leaks. I specialize in mechanical integrity and safety, ensuring that every repair—like a precision hose splice or an M22 fitting replacement—can withstand maximum PSI.